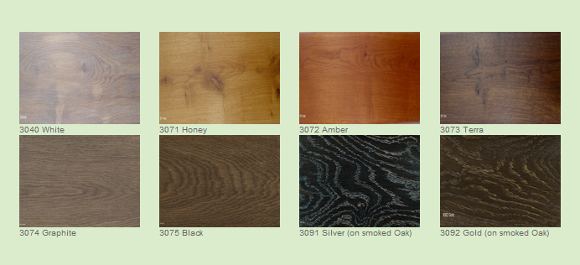
It’s a question we’re asked all the time: how to stain wood? From decking stain to Ronseal wood stain, black wood stain, exterior wood stain, grey wood stain and garden furniture stain, wood stains provide beautiful colour and help keep wood in great condition.
Here’s our special guide to staining wood, a partner to our previous post on the same subject…
About staining wood – An expert guide
How can you achieve a professional wood stain finish? First you need to know what type of wood you’re dealing with, or at the very least establish whether it’s a hardwood or softwood.
- Softwoods include things like pine, fir and cedar
- Hardwoods include beech, ash, elm, birch and walnut
- But…box is a very soft hardwood, fir is a very hard softwood and oak is a medium hardwood
How do you tell the difference between hard and soft woods?
This is a tricky one with no straight forward answer. If the grain is uneven, has lots of knots or includes blotchy patterns, it’s probably a softwood and may stain unevenly unless you follow a few common sense rules. Unless, of course, you actually want an uneven look – some people love it that way because it enhances the wood’s natural character.
If the wood has a consistent grain pattern, few or no knots, it’s probably a hardwood. You can use any kind of stain you like on hardwoods since they’re much more forgiving than softwoods, but bear in mind you might need to apply several coats to get the effect you’re after.
Types of wood staining product
- Oil-based stains deliver long lasting colour, penetrating deep into the material’s pores, to produce a micro-porous finish that brings out its natural beauty
- Water-based stains deliver an excellent even colour, are very low odour and easy to apply. The colour can also be easily diluted by just adding and mixing more water
- Solvent-based stains, including light fast stains, offer excellent colour and coverage with very quick drying times
12 steps to wood staining perfection
- Not 100% sure what you’re doing? Experiment first using a piece of the wood that doesn’t show or a piece of the same wood type
- Clean the wood first with white spirit so it’s free from grease, dirt and dust
- Grab sandpaper! Some guidance: The lower the sandpaper grit number, the rougher the sanded wood will be, the more stain will absorb into the wood and the darker the colour of the end result
- The higher the sandpaper’s grit number, the smoother the sanded wood will be, the less stain will be absorbed and the lighter the colour of the end result
- If you’re staining something flat, it helps to use a lower grit sandpaper, say 60 or 80 grit, to take off blemishes, then use a 100 or 120 grit paper to finish with
- If you want a medium depth of colour from your stain, don’t use anything higher than 120 grit
- When you’ve finished sanding, wipe the wood down thoroughly to get rid of dust and debris
- Apply your stain using a sponge, brush or cloth, depending on the manufacturer’s instructions
- Apply the stain generously, working in one smooth, continuous movement across the wood, in the same direction as the grain. Cover the entire item evenly
- If you don’t know how quickly the wood will take up the stain, wipe it on and off with a clean cloth and see what happens – you’ll soon get a feel for the way it behaves
- Bear in mind it’s easier to add more stain than remove it
- When you’re happy with the colour, leave it to dry
Handy tips to make staining wood easier
What about filled wood? Fillers rarely turn the same colour as the surrounding stained wood. You could try buying a wood filler gel and adding some of your wood stain to it to make a paste of the right colour. Or you can just go with the shabby chic flow and stain a piece in an ‘honest’ way, leaving the filler to do its thing regardless.
How do I make sure the wood stains evenly?
Woods such as Birch and Beech are notorious for going blotchy when stained. Always do a test area first, either on a different piece of wood or in an area that doesn’t show. If your wood blotches and stains unevenly, try wiping the wood over with white spirit as this will remove any contamination from the surface and help to give a more consistent colour and finish.
Some stains work better on blotchy woods than others. As a general rule, darker stains tend to work the best, with their high concentration of pigments. The more layers you add, the deeper the colour. It’s important to check the stain and sealer work together – in our experience if you stick to the same manufacturer for each, you can’t go far wrong.
One thing to beware of: if the wood is completely sealed, there’s no way your stain is going to penetrate beneath the surface. You may be able to dilute the sealer with mineral spirits, experimenting more safely with less chance of disaster. Again, test your diluted sealer on a spare piece of wood or in an area that doesn’t show.
What if I want a really deep, dark colour?
If applying a dark coloured stain, 2 or 3 coats should make it as dark as anyone would need. If you need it darker still, add a few drops of black from the same colour range but bear in mind that as well as making the stain darker, it will also change the colour shade slightly.
The final touch…
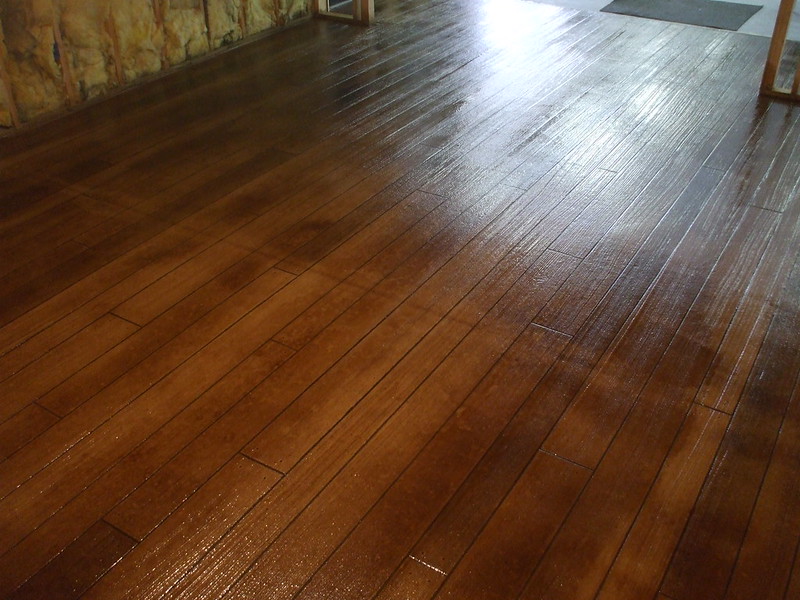
Once you’ve stained your item, it’s time to add a clear finish. Most finishes come in a variety of sheens, from high gloss to matt. This is one of the best bits of the job. Your wood already looks pretty damned good. But when you seal it the colour shines through beautifully and you get a wonderful finish. How satisfying!
Need our help with your stained wood project?
For more information about wood stains and their uses, contact our team of resident experts who are always on hand to help with project advice and product recommendations. Alternatively, see our wood stains FAQ page which covers many of the most commonly asked questions about wood stains.
We love to see before, during and after photos of any wood finishing project. If you would like to share your decking project pictures with us, you can either send us some photos or share on our Facebook, Twitter, Pinterest or Instagram pages.


I’ve sanded some new scaffolding boards to a smooth finish (120 grade). I want to use them to make some shelves and a lamp table. I have solid oak doors and want to aim to get the boards to an oak effect finish.
Do I need to use a sanding sealer first and what dye would you suggest?
Good Afternoon TC,
Thank you for your question. I would recommend taking a look at the Blanchon Hard Wax Oils first this is an oil that colours and protects the wood with two very thin coats applied. The natural colours with in the range could bring out a more oak like colour to the wood and sample sachets are available for test area to be carried out.
The Blanchon Hard Wax Oil will penetrate the wood surface to give a natural look and feel to the wood. And will protect for many years. It is easy to clean and maintain over time.
Another option to consider is to get the colour with a stain such as Manns Classic Pine Stain, for a water based stain or the Morrells Light Fast Stain for a solvent based stain that will be more intense in colour. You can then seal the stain with a varnish or Hard Wax Oil for protection.
Which ever you consider a test area is always recommended as the wood type, age and condition will all impact on the result that can be achieved. And we also have some great videos on our Wood Finishes Direct You Tube Channel with hints and tips for preparation and application methods.
I hope that helps and if you have any questions please do get in touch via our contact us page.
Kind Regards Samantha.
Can you help had a joiner put new staircase in for us he has filled the nail holes with a light coloured filer how do I stain the wood to cover the light filer as when I try the filer still shows through
Hi Janette,
It is possible that the filler used is one that cannot be stained. Do you have any off-cuts of wood from when the staircase was installed? The reason I ask this is that there are some wood filler gels, namely Fiddes Wood Filler Gel that may be a better option although this will mean digging out the filler that was used. This gel is mixed with sanding dust from the wood at a ratio of 50/50. It creates a filler that is partially made from wood so when applied, it blends in more with the surrounding wood. Another benefit of this filler is that it can also be stained and finished in the same way as the rest of the staircase.
It is always best to use sanding dust from the same wood to get the best colour match. Alternatively, Osmo Interior Wood Filler comes in around 15 colours and perhaps one of these may be a better match than the filler used. Many of the other wood fillers we do are also available in a range of colours.
If you need any further assistance with this, please feel free to contact us at any time.
I did a set of stairs for a client almost a year ago. Was just called to take a look as they said they are wearing off. When I went to look at them they were not in high traffic areas only on the one set of stairs and very odd looking. So I began to sand those spots, cleaned them then reapplied stain. But now they are now taking the stain. Almost as if there is a wax barrier. I have pictures of when the stairs were fresh wood, when they were first completed then now . I’m not sure what else I can do.
Hello Melissa,
Can you email me with the details of the product that has been applied to the stairs and send me some photos of the effected area. I am happy to take a look for you and see if I can offer some suggestions. You can email me at wood@finishes.direct FAO Sam.
Kind regards Samantha.
I will soon be installing (in my own home) some 40mm thick Black American Walnut kitchen worktops and need advice regarding staining/dying/colouring and finishing.
The worktops are good quality full-stave (boards width 11-15cm running full length) but there is some paler sap-wood within some of the staves which I would hope becomes toned-down and the contrast less noticeable.
This sap-wood would be easier to accept were it not for the fact that one more prominent section of sap-wood not only occupies almost the entire length of one of the staves, but also that stave’s full width; and is therefor defined by a hard, straight joint-line either side. To make matters worse, this stripe of sapwood runs along the the 2.4 metre by 80cm peninsular, which will be the show-piece of the open-plan dining kitchen.
Although an experienced woodworker, my experience with finishing is very limited and I’m almost phobic at the prospect of attempting to colour these expensive worktops… and ruining them: turning them into ghastly dark blotchy things.
My only starting point is that Danish Oil, or Tung Oil, is what is normally recommended for kitchen tops and would give a pleasant soft sheen and, as the room is a very well lit by two largish windows… one south facing, I need to ensure UV protection.
Can you recommend products, processes, techniques and tips?
John
Hello John,
Thank you for your inquiry. Are you able to send me any photos of the worktops ? Sometimes its easier to advice when I have been able to see the wood in question. The Danish Oil and Tung Oil are ideal for kitchens worktops and will give a soft warn hue to the wood and is food safe.
For a more durable oil that will need less frequent maintenance coats you could have a look at Worktop Oil from Holzol which is easy to apply, eco friendly and food safe whilst offering great protection. For more information please feel free to email me at wood@finishes.direct
Kind Regards Sam.
Once I have stained the wood and applied the hard wax oil is it possible to re-stain to a darker colour at a later stage.
regards,
Fiona.
I have a new green oak fireplace mantel which I need to colour match to the rest of my furniture which is a dark wood colour. Given its location what would be the best products to use with regard to staining, oiling, finishing etc.
regards,
Fiona.
Hello Fiona,
Colour matching can be difficult but is possible with a little experimenting. Your best option would be the Manns Classic Oak Stain. This is water based and has a wide range of colour choices available that can be intermixed to achieve alternative colours. You can also add water to lighten. But bear in mind that when you add a finishing coat of Varnish or Oil it will be darkened slightly, this is why full test areas are highly recommended.
You could look at the Fiddes Hard Wax Oil as a finishing coat. It is durable and leaves a natural finish to the wood. If you have any further questions just let me know – Sam.
Thank you very much for explaining the whole process and all the details you’ve described. The 12 steps guide is very helpful and I am sure it will help many people.
I’m refurbishing a eight year old oak floor in a wine bar. What are the best products for this situation and how should they be used? I think I may need a darker look than can be achieved with a clear varnish.
Regards
Eric
Hello Eric,
Thank you for your inquiry, the first thing to ask is if you will be stripping the Floor back to bare wood, as this will give you more options, or if you have any product on the floor currently that you wish to cover.
I would recommend removing any product that you have on the floor currently to get the best finish and one of our toughest and most durable products is the Bona Traffic HD this is a lacquer designed for the heaviest of Traffic areas, but will need at least 24 hours to cure before it can be subjected to full use. A clear lacquer will darken the wood slightly but if you would like more then you could put a Stain on the floor first, such as Manns Trade Light Fast Wood Stain which comes in arrange of colours, and can be spray, dip , roller or brush applicated. And has a quick drying time and covers approximately 10 meters squared per litre.