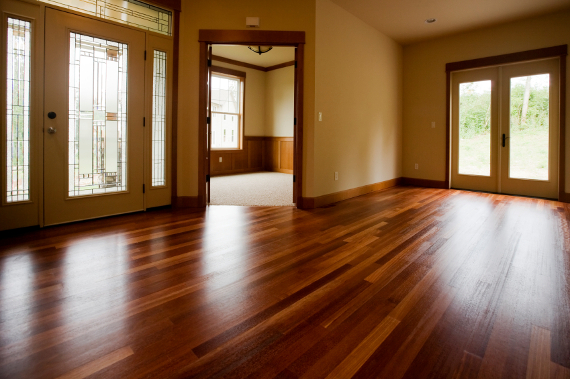
Using a quality floor varnish is a great way of enhancing the natural character and grain of wooden floors while protecting them from the general day-to-day wear and tear of busy environments. Cleaning and maintaining varnished floors with products specifically formulated for this purpose can help to keep them in tip-top condition for many years to come.
On the other hand while extremely tough, wooden floor varnishes aren’t indestructible. Luckily there’s plenty you can do to maintain that beautiful finish, whether it’s a clear matt, satin, gloss or perhaps even a tinted or coloured floor varnish.
Does your real wooden floor have patches of damaged varnish that are making it look tatty, rough and worn in places, or all over? Here’s some advice on how to improve the appearance of these troublesome areas…
Common problems with a varnished floor
We see it all, but the most common real wood finish, varnish-related problems we hear about are localised patches of wear, where chairs with wheels, castors and hard legs have worn the varnish thin. Sometimes the wear is so heavy it takes off the varnish altogether, right down to the bare wood, particularly around desks and tables. Excessive wear near exterior doors – your front door, back door, kitchen door and patio doors – is also common.
How does it happen? Small particles of grit, dirt and other abrasive materials brought in from the outdoors by the wind, pets and people’s feet slowly wear away the varnish in these high traffic areas, not unlike sandpaper. You might also find damage to wood floor varnish happens when something heavy or sharp is dropped, which chips or splits the floor finish.
Can Wood Flooring Varnish Be Repaired?
There isn’t a straightforward yes or no answer. It depends on the extent of the damage, the type of wood varnish being repaired and what you expect from the result. We thought it’d be useful to look at the issues and answer the most frequent questions our customers ask about repairing wooden floors with a varnish finish.
Real wood floor restoration Q&A
Q. What is the difference between floor varnish and floor lacquer?
A. There’s no difference. They’re one and the same thing. In the trade we usually call them lacquers, while the general public tend to call them varnishes.
Q. How can I tell which type of existing floor varnish I have?
A. It’s difficult to tell the difference between a water-based varnish for wood floors, solvent-based varnishes or oil-based floor varnish, especially by appearance alone. When they’re dry they look much the same, even to an expert. Most modern varnishes from the last 15 to 20 years are likely to be water-based. If the floor was varnished more than 20 years ago you can probably assume it’s an oil-based varnish. Water-based varnishes tend to give a clearer finish while some of the older oil-based varnishes had more of a warm colour to them. Solvent-based varnishes are usually used on furniture, applied with a spray gun because they dry so fast (usually within 10 – 15 minutes) and have a very strong smell. This makes them difficult to use on large, confined areas like floors.
Q. If I do have a damaged area that I want to repair, will it blend in seamlessly with the surrounding varnish?
A. Wood floor restoration rarely delivers a completely invisible repair when you’re working with varnish. The new varnish will probably have a different formula and things like age and natural colouration over time changes the appearance of the original varnish coating.
Wooden floor repairs – When the varnish is partially worn
If the varnish is only partially worn, you’re in luck. It should be fairly straightforward to tackle and the repair will be less obvious than varnish that’s worn right down to the bare wood.
- Stage 1 – Lightly sand the partially worn area with a 150 grit sandpaper, vacuum the sanded area to remove all traces of sanding dust and debris.
- Stage 2 – Apply a thin coat of floor varnish like Manns Extra Tough Floor Varnish or Ronseal Diamond Hard Floor Varnish over the worn area, then let it dry.
You can take this approach for the entire floor, but always do a test patch first in a corner to make sure the new floor varnish is compatible with the old finish. Leave it for 24 hours then scrape the surface with a thumbnail to test it has stuck fast to the original finish.
Wood floor repairs – When the varnish is worn away to the bare wood
When you need to tackle areas that have worn right through to the bare wood, the process is a little more complex. It’s also worth bearing in mind the final wooden floor restoration finish probably won’t blend in as well as repairing a partially worn surface.
It helps to think about the damaged area as a very shallow bowl, where the bare wooden floor is the base of the bowl and the undamaged floor surface surrounding the damaged area is the rim. The inside of the bowl is rough and ridged and the uneven raised rim makes it look like the crater of a volcano in miniature.
You need to sand the damaged area smooth so you get a gradual transition between the bare wood and the undamaged surface. As you apply each coat of varnish during the repair process, you’re filling about a third of the bowl. By the third coat, the freshly applied varnish has filled the damaged area to the same level as the existing varnish finish.
- Stage 1 – The first stage is to gently sand the edge of the varnish from the bare wood area of the ‘bowl’ you’ve visualised to around 150mm beyond the edge of the bare patch. Use a fine 150 grit sandpaper to get a nice smooth transition from the bare wood to the edge of the repair area. There shouldn’t be any trace of a lip or edge between the damaged and undamaged areas, and you’ll be able to feel when you’ve got it right. Run your hand over the sanded area to check you’ve sanded the edge completely smooth.
- Stage 2 – Hoover or wipe the area carefully to remove all traces of sanding dust and debris.
- Stage 3 – Apply a thin coat of varnish, ideally with a small brush, to just the bare wood area for starters, overlapping the thinnest, sanded area of original varnish by 10mm or so.
- Stage 4 – Allow the varnish to dry thoroughly.
- Stage 5 – Gently rub the dry finish with a fine 320 grit sandpaper to get rid of rough bits and particles (a process called de-nibbing) then vacuum or wipe the area with a clean, dry cloth to remove all traces of sanding dust.
- Stage 6 – Apply a second thin coat of varnish from the centre of the repair but this time go as far as 100mm from the bare wood area, and about 50mm in from the undamaged floor surface area.
- Stage 7 – Let the finish dry thoroughly then gently de-nib the freshly coated area with a fine 320 grit sandpaper, then hoover or wipe the area to remove stray sanding dust.
- Stage 8 – Apply a final coat thinly over the whole repair area up to the point where the good varnish starts and overlapping the good floor surface by around 10mm.
What about aiming for total wood floor repairs perfection?
Varnish repair and maintenance is part and parcel of most real wooden floor restoration projects. While you are unlikely to achieve perfection, the current trend for preserving a beautiful, interesting patina means flawlessness isn’t as desirable as it was not so long ago, when we were all decorating in immaculate minimalist boutique hotel style.
Wood is natural and flawed, every piece is unique and the wear and tear you and your family create contributes to the floor’s beauty and personality. Taking care to maintain a varnished floor and dealing with areas of wear and damage quickly means you’ll prevent damaged areas from getting worse, extending the usability and enjoyment of wooden floors for longer, if not a lifetime.
Need help varnishing your wooden floor?
For more information about wooden floor varnish and its uses, contact our team of resident experts who are always on hand to help with project advice and product recommendations. Alternatively, see our floor finishes FAQ page which covers many of the most commonly asked questions about floor finishes.
We love to see before, during and after photos of any wood finishing project. If you would like to share your project pictures with us and our followers, you can either send us some photos or share on our Facebook, Twitter, Pinterest or Instagram pages.


Hello I’ve got real wood flooring it’s been down about 17years got a few scratches an a few little chip marks where my children had dropped there toys don’t know what varnish to use an how I can get these marks out it’s a light flooring probably like a very light pine colour if u could help me
with this please just the colour is bit confusing I’ve
Looked at colour charts online an it looks like lightest oak
Hello Maria,
Thank you for getting in touch with your question, colour matching is a common request, and one sadly that is not always easy to get right. The application of a product to any wood is so influence by the type, age and condition of the wood it can be difficult to achieve the desired result, not impossible however. What you can use will also depend on what is currently applied to the wood and what condition that is in. perhaps if you would like to email me with some photos and details about if you are sanding back to bare wood or not, and if you know what the current finish is? I can advice further on your project.
If you get in touch via our contact us page and once I have answered that you will be able to send me some photos also.
All the Best Samantha.
Hello,
I’m about to sand down my hallway and lounge floors in my 1930’s property and have hired out a floor sander and edger. I’m torn between two varnishes as both have positive and negative reviews on DIY sites.
The two varnishes in question are Ronseal Diamond Hard floor varnish and Manns Extra Tough floor varnish. Could you please let me know which one our of the two will provide a longer lasting, hard-wearing finish. I have two kids and frequently have family around, so the varnish needs to put up with these factors! Also I like to steam clean my floors, is this recommend with floor varnishes or will I be undoing all my hard work?
One last question, in-between varnish coats (after the varnish has dried) I need to key the area with a light sand, what grit do you recommend for this or is a manns finishing pad or denibber pad better for this?
Many thanks,
Nav
Good Afternoon Nav,
Its always difficult to know what is the best option to go for. With so many products on the market now it can be a mind field. If you do ever need any guidance we have a great team on hand to help 7 days a week, just give us a call or message via our contact us page.
The Manns and Ronseal products are both very good, if I had to pick one I would probably go for the Manns as I would expect this to be that little bit more durable. It also has the benefit of having sample sizes available to allow you to try test areas first.
For denibbing between coats I would recommend the higher grit Woodleys Flexible Sanding Pads you only need to lightly go over the first coat with the pad, and then wipe down with a damp cloth before application of the second coat. A thrid coat is also and option if you want a little more shine and it can also add durability.
I hope that helps.
Kind regards Samantha.
Hello. I have an parquet floor. People delivering new washing machine dragged it in and have left tracks down the legnth of the kitchen. I think just the varnish has come off, not scraped the actual wood. How do we fix this?
Good Morning,
How frustrating! The above blog gives some hints and tips on blending varnish patch repairs. Its fair to say that patch repairing varnish is not an easy thing to do and you will perhaps still see some join marks. However resealing to prevent moisture ingress is vital as any moisture that is able to get into the wood or under the varnish will cause it to lift and flake.
For further advice please feel free to get in touch via our contact us page.
Kind regards Samantha
I put Ronseal diamond hard floor varnish on my kitchen oak floor after sanding off the original 20 year old finish. I noticed black marks appearing last Spring that were clearly shoe prints. They would not wipe off but had gone through and stained the wood black – only hard sanding would get rid of them. This has just happened again and I now realize that the marks are due to residue of lawn weed and feed products on the shoes – I suspect the ferrous sulphate part which is the mosskiller.
This has not happened in my hall which still has the old varnish.
This is so bad you can actually see a track where I have walked across the floor with the shoe print clearly identifiable. Have you come across this ? I can find nothing on the web
Good Morning Colin,
My apologies for the delay in getting back to you, this is not something that I have come across before, however the chemicals in garden products such as weedkiller can be strong and damaging to many surfaces and finishes as well as plants and wildlife.
I do not know of a way to rectify this I am afraid and suspect it might mean sanding back and starting again. Please do not hesitate to get in touch via our contact us page if you have any questions.
All the Best Samantha
Hi
I hopping to sand and revarnish a wood floor in sections because of furniture issues do you think it is possible to “blend “ the varnish from the 2 sections that are done at different times or will I be left with a visible line.? Can you recommend a type of varnish best for this ?
Many thanks
Paul
Good Afternoon,
I would always recommend full application in one go to get that even all over finish. If this is really not possible then complete full lengths of board rather than half and half as you will get a join mark for sure.
It will be vital to ensure that the product is very well stirred before both applications and even with all of this carried out carefully there is still a chance that you will be able to see a slight difference if you apply in two sections at different times.
The outcome will be the same for any varnish applied but a good option to consider is the Manns Extra Tough Floor Varnish this one comes in a range for sheens and sample sizes to allow you carry out test areas first.
I hope that helps and if you have any further questions please do not hesitate to get in touch.
All the Best Samantha.
Hi
We have a wood block floor that I presume is varnished the blocks are made of different pieces laminated together and I would like to paint it white , I have tried getting the varnish off with a strong stripper nitromors but nothing has come off after alot of hard sanding i just get some white powder what is the best way to go about it and should I wax it afterwards to seal the paint ?
Good Afternoon Joanne,
The best way to remove varnish from a floor is to sand. It can be a big and somewhat messy job. Although many modern sanders are very good at reducing dust these days. It is the best way to remove from large surface areas and prepare the wood for a treatment as well. Most finishes recommend sanding before application to a specific grit to open or close the grain, which ever best suits the type of finish you are applying or the type of wood you are applying to.
White finishes are very popular and on trend at the moment and when done well can look amazing, however they can be difficult to apply and we have a very helpful blog on white finishes >> https://www.wood-finishes-direct.com/blog/beautiful-interior-white-wood-finishes-for-dreamy-interiors/ with some product suggestions and best practice for getting that perfect white finish. If you have a read and feel free to get back to me if you have any questions via our contact us page.
The key to getting the right white will be test areas.
Kind regards Samantha.
Hi i recently varnished a bare ash floor with clear gloss ronseal diamond floor varish. when the light shines in the window from the side it looks like there are really high gloss patches and patches of only a light sheen . is this normal or should it all be an even shine ?
Good Afternoon Catherine,
Thank you for getting in touch with your enquiry. This can sometimes occur if the product has not had sufficient stirring before and during application of the product. Particularly if the varnish is Matt or Satin, the Matting agent needs can cluster and result in an uneven shine.
Or alternatively the varnish is highlighting some flaws in the floor, this could be inconsistent sanding, or simply the condition of the wood that you are applying it to. For further advice please feel free to get in touch via our contact us page or call and speak to one of our friendly advisers on 01303 213838.
Kind regards Samantha.
Hello,
Can I put any kind of floor varnish over new lacquered engineered wood flooring without sanding?
Look forward to your suggestions!
Thanks
Laura
Good Afternoon Laura,
If you would like to get in touch with more details about your floor and what is currently on it, water based or solvent based Lacquer ? And I will be able to advice you further. You can send details to our contact us page.
If the floor was lacquered by the manufacturer then it is likely to durable enough to with stand every day use, and so I would be keen to know why you would like to apply a further varnish.
I look forward to hearing from you.
Many Thanks Samantha.
Hello,
The varnish on the pine floor in my kitchen and hallway has worn away in patches over its entirety and is very dirty in those areas. It really looks a mess!
Can you advise on the best way to clean and re-varnish please?
I am hoping to avoid hiring a sander – as I did when the job was done several years ago – and am considering using a liquid varnish remover to remove all traces of varnish. Would this work/be sufficient to clean the wood too? What are your thoughts on this?
Would be good to hear.
Thank you!
Wendy
Hello Wendy,
Thank you for getting in touch with your enquiry. For a quick strip you could have a look at the Paint Panther Paint and Varnish Remover this causes the varnish to bubble up to be scraped off with a filler knife. It can be a little messy but I can confirm from experience that it is an effective stripper. Always try a test are a first to ensure there is no adverse reactions
Once you have removed all the varnish and cleaned up, I would advice a light sand with a 120 grit all over, this will help prepare the wood for application and improve adhesion or absorption of which ever product you choose to use moving forward.
Once you are ready to re treat your floor you could consider a varnish again, such as the Manns Extra Tough Floor Varnish this is a very durable and hard wearing varnish that does come in a range of sheen levels.
As an alternative you could consider a Hard Wax Oil this is a penetrative finish that gives a more natural look and feel to the wood. It is fair to say that it will not be as long lasting and durable as a varnish, however the big benefit of an oil is that it is far easier to maintain over time, it will not peel and flake, but simply wear away, there is not a need to strip back and start again, you can simply ensure that the surface is clean and dry and then re oil. This could be every two or three years or even longer depending on use.
I hope that helps and if you have any questions for me please do not hesitate to get in touch.
All the Best Samantha.
We have been sanding our old hardwood floor. There are various very small, fine scratches that remain from the machine which are barely visible unless you look closely. We are aiming to put on a medium oak stain. We were wondering if these very small scratches will become very visible once varnished or if they are likely to remain difficult to see.
Many thanks.
Good Morning Beth,
It is likely that application of any product will highlight any marks and scratches that are on the surface, but the best thing to do is a small test area with the stain and top coat to get an idea of how much it will show up and if you are able to live with it. Sometimes a little hand sanding in the direction of the grain, in areas particularly effected can help.
For any more obvious scratches you could look at filling with Wax Filler Sticks this can help mask any larger scratches if there is a colour to suit your needs.
I hope that helps and if you have any further questions I am here to help.
Kind regards Samantha.
Hi I’ve just fitted a dark coloured engineered wood floor to my home and have also been painting and there is blobs and loads of tiny specs of white paint and I’m struggling to remove it would it be easier to just use a dark varnish over it all?
Hello Sam,
Are you able to email me with details of what is currently on the floor ? What type of paint has been used and I can advice from there. You can email me at wood@finishes.direct
Kind Regards Samantha.
Hi I have an old oak floor in a 100 year old house that has been varnished with a dark varnish. The area at the door has become very worn down to the light colour oak floor. I have read all the tips above and will follow them. Just wondering if you have any additional advice and whether the whole floor should be revarnished on top of the repair of the bare areas – baring in mind that the colour is not likely to be identical?
Hello Lauren,
Doorways often wear quicker than other areas of the floor. Once you have patch repaired and are happy with the finish, applying a fresh coat all over can help reduce any join marks and improve over all durability of the floor. It will help to bring colours together although I can not grantee that there will not be some slight variance between the repaired area and the rest. Test areas are the key, I hope it works well for you and if you have any questions or there is anything further that I can help you with please do not hesitate to get in touch.
Kind regards Sam.
We have golden oak flooring from an estate. We know the varnish is a hard type, not wax or water. We believe it is a stain varnish.
Some areas have been left bare (in a closet) and balance varnished. We do not know if it has been waxed or not.
Would you suggest how to go about refinishing without completely stripping all the flooring. Would you suggest the type of varnish or stain varnish to use.
When we sand the board to blend the unfinished & non-finished seam line the wood looks the same. Do we need to be careful not to sand to much or the wood would not take a finish?
Thank you for any suggestions you might have.
Hello Linda,
You could consider the Diamond Hard Floor Varnish which is a great product for floors. It is durable and hard wearing and will go over most existing varnished floors. A test area should always be done first to ensure compatibility with the existing finish and that you will like the look that will be achieved. Light sanding is required to give a key for the new coat to adhere to and some blending as advised in the blog to try to avoid join marks. See how you get on and if you have any other questions please do let me know.
Kind regards Sam.
I have white painted pine floors. The house is a summer house & so often retains moisture during winter months when it is closed up.
We have now brown ring stains due to damp coming up from the wood. How do we repair & for future avoid please?
Thank you
Allie
Hello Allie,
Thank you for your inquiry, as you suspected this is due to weeping knots, they are a common problem for pine and it can be difficult to control the staining coming through from the tannin. We have a product on our website from Barrettine called White Knotting which can be used under both solvent and water based products. This should help prevent the stains that you are getting, but this does need to be applied under the paint. I hope that helps and please let me know if you have any further questions.
Kind Regards Sam.
Hi,
I recently restored an old pine floor that had been forgotten under decades of carpeting… Sanded, stained and varnished with a water based varnish. Very proud of the result, and it was tips and instructions on sites like this that helped me get it right.
A year later, I may have to lift a floorboard or two because the radiator pipes underneath are misbehaving. Obviously that will mean tearing through the varnish all the way down to the wood when they’re lifted. Would the process to restore it to its previous state be the same as you described above for varnish that has completely worn away, or would I need to do more?
Thanks, Chris
Hello Chris,
Thank you for your inquiry, the best way to deal with this is when you remove the boards, remove the varnish and only lightly sand. If you sand too much this may make the new finish look slightly different to the rest of the floor. Re varnish the boards and replace.You may need to do a little bit of the blending as suggested in the blog but not to the same extent, it will depend on the joining area. You may then re varnish the whole floor and this should bring it all together and refresh the over all look. I can’t guarantee a flawless blend between old and new boards but this is probably the best and easiest way to go about it. Also be careful of gaps between boards if they are more than a few millimeters you may need to tackle it differently. I hope that helps and please let me know if you have any further questions.
Kind regards Sam.
We had our floors refinished – Bona water-based – and now have noticed varnish “spills” that were missed. What’s the best way to remove?
Thanks.
Hello Deb,
If you would like to send some photos of the ‘ spills ‘ we can take a look for you and offer some advice on how to repair with the best result. Sometimes its easier to advice on issues like this when we can see the problem. Photos can be sent to wood@finishes.direct and if you can try to get the images in natural light rather than artificial that would be great – Sam
We are currently refinishing our hardwood Maple floors. We sanded the floor down to the wood (or so we thought) and we have started our test spot and noticed that after staining (using a Bona medium brown color) there are bald spots from where the stain is not absorbing, because we were not able to remove all of the old varnish as we had thought we had!
Do you have suggestions for fixing these areas/spots that have already been stained? Liquid sand paper on those areas, a gel stain closely matching the color of stain?
These maple floors have been quite challenging, but we are determined to have them stained a rich brown color in our new dream home!
P.S. we have also water popped the test area which seems to be helping with stain absorption.
Hello,
I put this inquiry to our Flooring expert who suggested to sand it back more then give the floor a wipe over with meths or white spirit this should show up any missed lacquer, and also open the grain, when you see these areas lightly outline with a pencil, then once dry you can rub the offending areas again (I use a random orbital sander for this) until you have removed all the varnish .
If you do not remove all residual lacquer or wax you will never get a even stain There is no shortcut . The more you put in to the preparation the better you’re finish will be. I hope this is helpful.
Hello, I would like to subscribe for this website to take hottest updates, therefore where can i do it please
assist.
To subscribe to our newsletters and up to date information, go to our home page on the website where you can sign up. Thank you for your inquiry – Sam