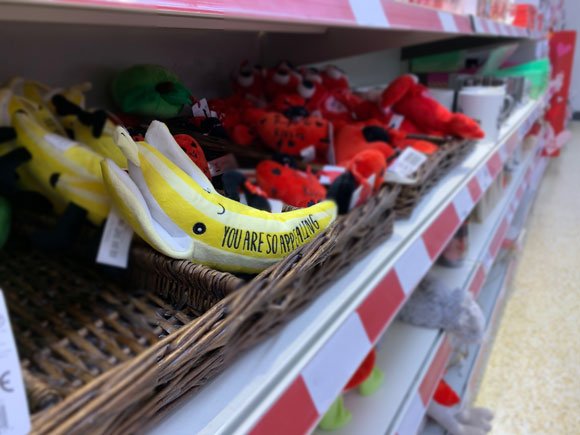
With less than 2 weeks until Valentine’s day, the shop shelves are brimming with cards, cuddly toys, and about anything else that will tempt those that have forgotten about, or left Valentine’s Day to the very last minute, to part with their hard earned cash.
According to one piece of research, spending on Valentine’s gifts in the UK has increased from £460 million in 2015 to an estimated £650 million in 2018. That’s an increase of £190 million or over 41% in just 3 years.
What will you be giving this Valentine’s Day? Will it be flowers, chocolates or something more extravagant? Although there’s virtually no end to the list of gift possibilities, many Valentine’s gifts are expensive, cheaply produced and often, forgotten about from one year to the next. This year, why not break from tradition and come up with something that is relatively cheap, takes just a couple of hours to make, and is likely to hold pride of place in your home for years to come. After all, nothing shows your love more than a personalised gift.
In terms of skill, we class this project as ‘easy’ as all that is required is a little sawing, some gluing, the ability to cut out a stencil and some simple painting.
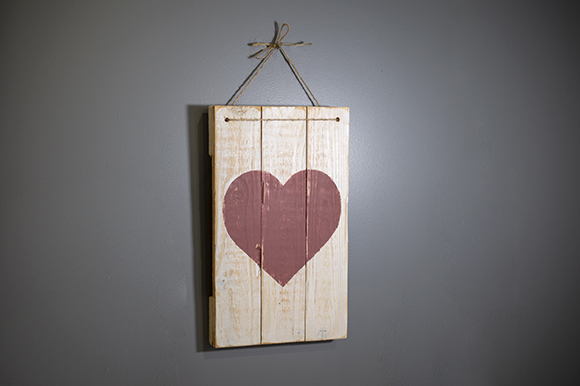
What are we going to create?
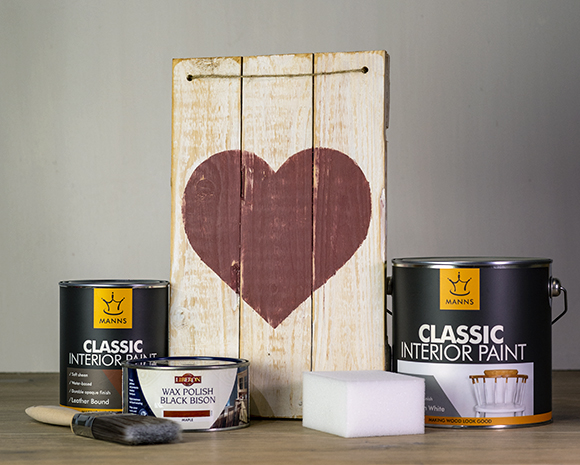
In short, it’s a wonderfully simple yet rustic looking heart picture painted on to reclaimed wooden pallet slats. The finished article produces a pleasing weathered, Shabby Chic or even drift wood appearance. The beauty of this piece is that it can be as big or small as you please so that it fits in with the décor of any sized room, be it the bathroom, bedroom, hallway or lounge.
What will you need?
- Some reclaimed pallet slats. These can usually be obtained by simply asking businesses at any industrial estate or site
- Water-based paint. We used Manns Classic Interior Paint in Fresh Cotton White & Leather Bound, 1 x 100ml pot of each colour
- Strong PVA Glue. We used Osmo D3 Express Wood PVA Adhesive
- Heart shaped stencil readily available for printing
- Synthetic bristle brush. We used the ProDec Trade Pro Bristle Blend Brush
- Sandpaper 120 and 240 Grit. We used Woodleys Sandpaper Sheets
- High density sponge. We used Woodleys Foam Sponges
- To give the piece a more aged look and a beautiful waxy feel finish, an optional wood wax can be applied.
How is it done?
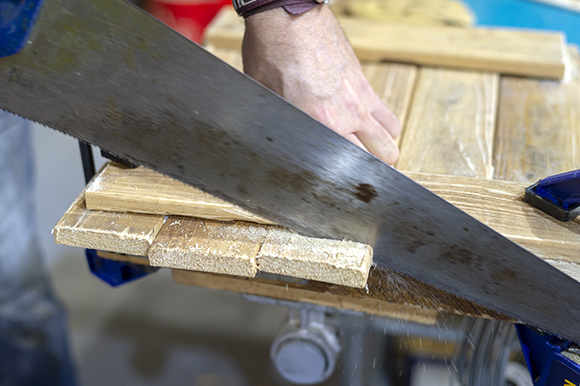
- Start by cutting the pallet slats to length. For our picture we cut 3 pieces of wood to 36cm or around 14 inch lengths. We cut 2 additional pieces for sticking to the rear which hold the picture together. This project can be scaled up or down as much as you please.
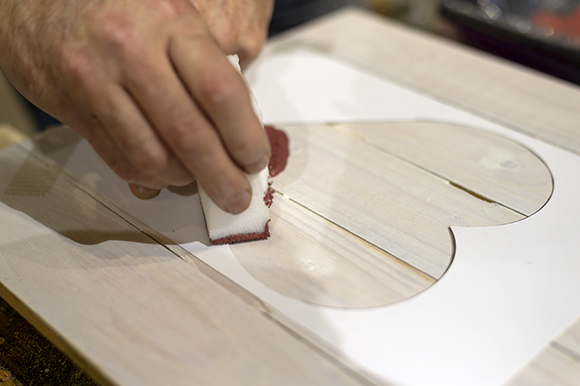
2. Sand the pallet slats smooth with P120 & P240 grit sandpaper sheets, paying attention to the edges and ends to remove rough edges and splinters. Once sanded, we recommend to wipe down the surface with a damp cloth to remove all traces of sanding dust prior to painting, then allow to dry.
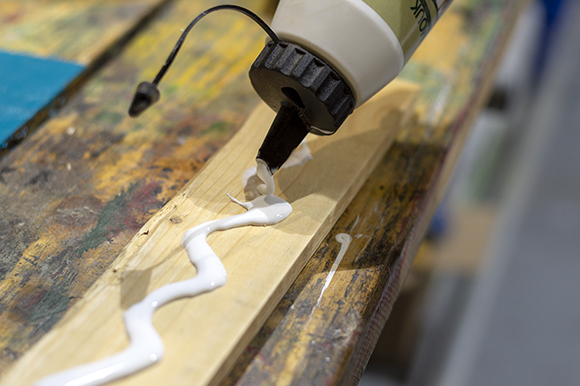
3. Glue the pallet slats together using 2 more slats running in the opposite direction across the back with a strong PVA glue.
4. Paint the front side and edges of the panel with 2 coats of Manns Classic Interior Paint in ‘Fresh Cotton White’, using a synthetic bristle brush.
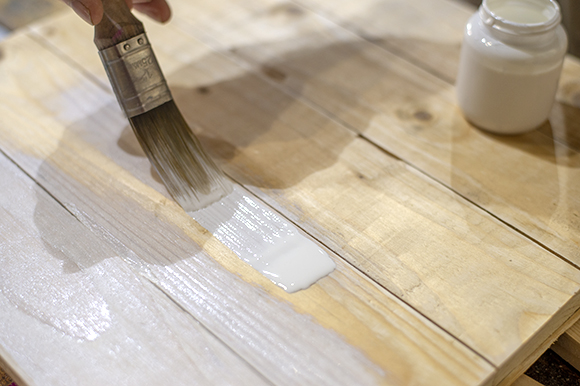
5. Allow the paint to fully dry then lightly sand the painted surface with p240 grit sandpaper to give it the slightly distressed or ‘Shabby Chic’ look. The level of distressing depends on how aged or weathered you want the final item to look. For a more worn or distressed look, simply sand the white painted area more or by using a coarser 120 or even an 80 grit sandpaper.
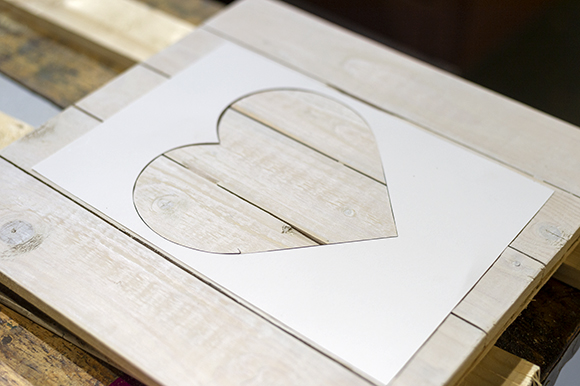
6. Fix the heart shaped stencil in place using masking tape or other suitable fixing tape. As the Manns Interior Classic Paint is super durable, the tape is unlikely to mark the finish.
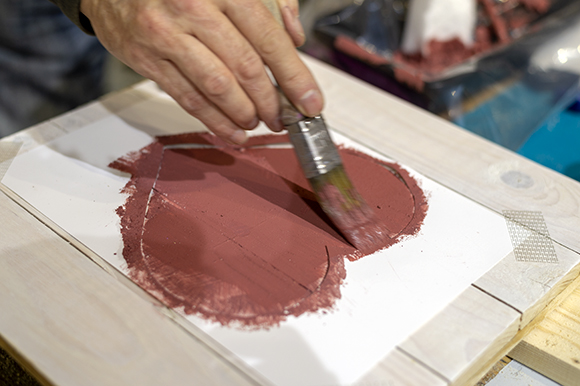
7. Paint the stencilled heart shape with Manns Classic Interior Paint, ‘Leather Bound’, by dabbing the paint over the stencilled area with the foam sponge.
8. Gently brush inwards from the edges of the stencil to ensure a nice crisp edge to the stencilled heart area. If you are confident enough, the piece can be personalised further by adding either a stencilled or written message.
9. Allow the paint to fully dry then gently remove the stencil from the surface of the wood. Although not essential, the picture can then be coated with a clear or coloured wood wax to give it a waxy character and a more aged look.

Voila!
And as the claimed most romantic nation on the planet would say “Voila”, a master piece good enough to be hung at the Louvre in Paris.
The whole project, including drying time should only take 4 or 5 hours. Exclude the drying time, and the actual working time is going to be more like an hour to 90 mins, hardly any time at all for the one you Love.
We love to see before, during and after photos of any wood finishing project, wood crafts included. If you would like to share them with us, you can either email us your photos or share on our Facebook, Twitter, Pinterest or Instagram pages.
Here to help
Need some help or advice on which products to use on your wood finishing projects? Contact our team of resident experts who are on hand to answer any questions you have about your project and which products to use.


