If you’re lucky enough to have a real wood, period feature front door, which has perhaps fallen into a state of disrepair over the years, you have a great opportunity to make a lasting impression on visitors and, if you’re planning to sell, potential home buyers. After all your front door makes a powerful first impression and you want it to be a good one. Your back door’s aesthetics might not matter so much but it still needs to be solid, well cared for and fully functional, all of which means maintenance, AKA common sense wood door renovation.
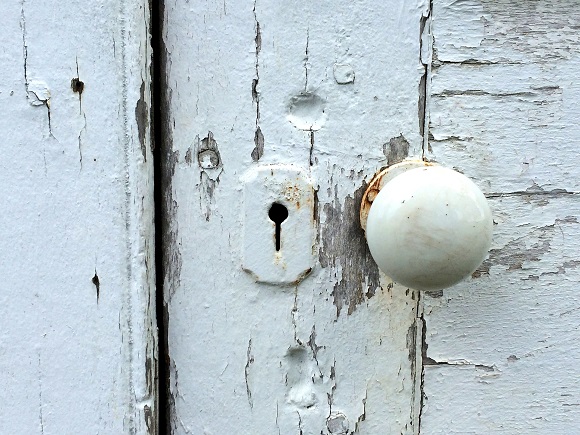
Looking at wooden front and back doors that have been used and abused over the years, with knocks, dents, scratches and shabby looking paintwork all too visible, it can be difficult to imagine yours looking anything but knackered. If you think, however, of the door at Number 10 Downing Street, or for that matter any other door with a gleaming, perfectly smooth, expensive-looking finish, just remind yourself that underneath it’s just regular wood, nothing magic.
So where to start? In most cases, this is a job where it’s easier, faster and more convenient to remove the door and restore it under cover, perhaps in a garage or shed, although doors can be restored in situ.
How to beautify wooden doors
Here’s how to make your doors look beautiful, brand new and well cared-for. Get it right, apply the correct type of exterior wood paint and they’ll last for years longer.
Step 1 – Removing door furniture
If possible, remove any fixtures or other door furniture, including the letter box and door knocker. If these are also period features, can they be polished and rejuvenated, restored professionally or replaced with new? If you’re looking to transform the door into something amazing it would be a shame to put the old tarnished fixtures back onto your masterpiece.

Step 2 – Removing exterior wood paint with paint stripper
Removing outdoor wood paint from doors needn’t be the nightmare most people dread. Sanding away thirty, fifty or more years of paint with an orbital sander is nobody’s idea of fun and could potentially create a cloud of toxic dust, especially if the wood paint dates back to the early ’70s and earlier, when lead-based paints were the norm.
If sending the door to be chemically stripped just isn’t an option, consider a paint remover product like Peelaway 1 or Peelaway 7 for the job. You can even buy a test pack including both and see which works best. These are both poultice-based paint strippers that have an almost window putty-like consistency. They’re spread over the paintwork, covered with a special plastic blanket, left for 24 to 48 hours then peeled off, hence the name Peel Away. The beauty of this type of external wood paint stripper is that when the blanket and putty are peeled off the surface with the special spatula, the dissolved paint comes away cleanly with the paste and blanket nicely contained. Brilliant!
Peelaway paint stripper comes into its own if the door has any decorative carvings or panelling. When applied, the paint stripper is easily pushed into all the nooks and crannies that would be virtually impossible to sand, then literally pulls the paint out of these difficult-to-reach areas.
Step 3 – Door preparation – Using wood filler
As with any DIY Project, preparation is key. Once stripped, the door should be lightly sanded with a 120 grit sandpaper to remove any remaining traces of paint and paint stripping product. This gives you a good key for the new coats of primer plus your chosen exterior paint for wood, in whatever colour you fancy. You can buy oak wood filler to match the colour of an oak door. Or you can try wood filler wax sticks, very like wax crayons, perfect for fast, simple repairs to wood when you want to retain the natural colour.
Once you’ve done your sanding it’s time to concentrate on all those dents, dinks and holes. Use a good quality exterior wood filling product to repair all the imperfections. If there are any large, deep holes, don’t try to fill them in one go. Do one layer of wood filler first and half-fill the hole, let it dry, give the surface of the wood filler a quick sand – again with a 120 grit sandpaper to give the surface a key – then fill the hole up to the surface. Once the wood filler has fully dried, sand the filled areas so that they are smooth and flush with the rest of the door. So far so good.
Step 4 – Door preservation – Making wooden doors last longer
If they’re not properly treated, wooden doors can succumb to a wide range of biological threats including mould, algae, dry rot, wet rot and insect attack. Treating the door with a quality wood preservative before applying the undercoat, primer or base coat will help protect the wood from these biological threats. Be sure to follow the manufacturer’s drying times when using a wood preservative. Although solvent-based preservatives are touch dry in just a few hours, the recommended drying times are usually several days. This is to allow the solvents – which could otherwise potentially affect the undercoat and paint – to fully evaporate from the wood.
Step 5 – Undercoat and painting – Choosing the right paint products
Once the door has been stripped, filled, sanded and preserved, you’re ready to tackle the more rewarding part of the process. Choosing the right outdoor wood paint or special weatherproof wood paint is critical. Choose a cheap wood paint option and you could find yourself repeating the whole process again in just a couple of years, sometimes less. Remember that wood is an organic material which changes with heat and humidity, so choosing a flexible wood finish is a must. Manufacturers like Ronseal provide assurances on their Ronseal 10 year Exterior Wood Paint and others, guaranteed as long as it’s used in conjunction with the recommended primer.
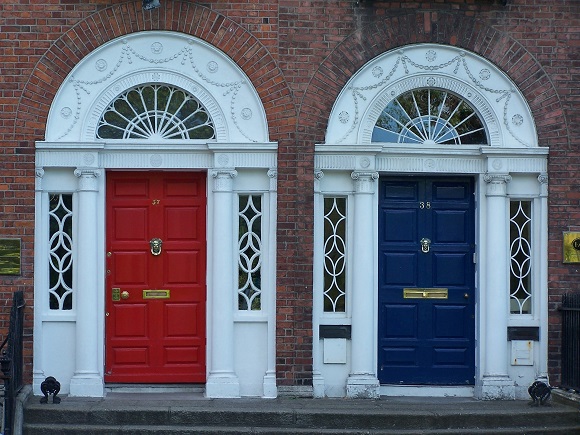
What about wood paint colours? You can get more or less any colour in existence, there’s a vast choice. Once the door has been primed and painted and your door furniture has been re-fitted, its time to stand back and admire your handy work. Well done!
Need help restoring a wooden door?
If you’re about to embark on a door renovation project, front or back, we would love to see your before, during and after photos. If it’s a project that you’ve been thinking about for some time and would like some expert help and advice on which products to use, our friendly team are always on hand to help, just give us a call.
Want to know more? Check out our companion guides to door maintenance and care:


Hi, just reading your article and lots of tips so thanks for the information 🙂 We are looking at restoring our front door over the summer, along with the door frame. We will at some point need to take the door off the hinges to get into the hard to reach parts of both door and frame, and the hinges are caked in paint so we want to restore them.
What would you recomened the best way to do this is? Would you take the door off and then back on at the end of the day? My only concern doing this would be that the hinge screws would get loose with the constant movement. Any tips on how to manage this would be greatly apreciated!
Also would you recomend a heat gun at all? Or is it best to go for a chemical striper?
Many thanks
Rachael
Hi Rachael,
We’d recommend you do some test areas, but give us a call us and we’d be more than happy to help you.
Thanks,
Samuel
Hi, we have a single opening door with half side lights that leads out in the garden. i has been neglected over the years. The side lights have got to the point where the frame has begun to rot around the cill area and in areas where water pools. In Fact the wood has shrunk away I can pass my finger through the gap to the outside.
We have been looking at our options, and I’m contemplating removing the rotten parts and renewing with new wood. However, the frame has some sort decorative architraving which I’m unable to find.
Can you recommend a place where I can get similar frames machined?
While working with is not job, I’m actually quite competent thanks to skills learned from my father who will be on hand to help in return for tea and biscuits.
Thanks in advance
Andrew
Hi Andrew,
I wish I could help but this is not really our area. I can help with the best finishes to protect your wood from future damage, but unfortunately not where or who can provide replacement wood for your project.
Perhaps some of the wood work forums or Facebook groups will be able to help with a matter such as this and personal recommendation is usually the best.
I am sorry that I can not be of more help on this occasion.
Kind Regards Samantha.
Hello,
I have found this site and the guidance it contains extremely useful, as I’m a complete novice in these kinds of projects.
I have a 1930s front door which I’m embarking on a restoration mission with. It came stripped and I’m in the sanding / making good stage but have a couple of questions if I may;
Is it important that I apply the wood preserve following filling? I would have thought ensuring the preserve gets into all the nooks and crannies / exposed wood grain would be beneficial….
And secondly, there is some gapping between some different sections of wood, not completely though a couple of millimetres wide and deep, I assume this is due to a little shrinkage or movement due to age. Is this a major problem or will two part filler be sufficient.
Any advice you may be able to offer will be greatly appreciated.
Cheers
Good Morning Chris,
Thank you for getting in touch, it could depend on the preserver you are using versus the filler you are using. Many preservers contain wax to repel moisture and these can also repel any products that you are looking to apply over the top, such as paints, stain, varnishes and some fillers. So it is most likely that you will need to apply the filler first and than the preserver. We always recommend doing a test area first and especially when using 2 different products to test product suitability and compatibility.
For areas that need filling and require a little flexibility should the wood shift with the seasons, look for a flexible exterior gap sealer that is suitable for sealing cracks, seams and connection joints. These tend to be the mastic type fillers in a tube but be sure to source one that is suitable for exterior use.
If flexibility is not required then you could also consider the Morrells Two Part Coloured Wood Filler which comes in a range of colours to suit your needs.
I hope that helps and if you need any further advice please do not hesitate to get in touch with one of our friendly team of advisers via our contact us page.
Kind regards Samantha.
We have 4 sets of Teak church doors in need of repair. Looking for someone who knows how to handle this type of project correctly.
Hello Anthony,
Thank you for getting in touch with your enquiry. If you would like to email me directly with further details of your project, what the current finish is, if you are sanding back to bare wood, what type of look or finish you would prefer? And finally are these interior or exterior doors? You can email me via our contact us page and I can narrow down some options for you to consider.
Kind Regards Samantha.
I have reclaimed carved antique Indian doors made out of teak. They are very heavy and have been badly weathered.
I don’t want to sand in fear of damaging the carving.
Any advice please?
Searched the web but it seems it is a well kept secret.
Thank you!
Hello Sandy,
Thank you for your inquiry. Can you tell me what you are looking to do with the doors, refresh or clean them? Change the colour? And are they internal or external? I will be happy to help and advice further with some products. I did try to respond to your email also but it failed.
Kind Regards Samantha.
I am about to attempt to renovate our church main door.
It is oak and very old and in a poor state, it looks as it has previously had a clear varnish applied which has deteriorated over many years.
The door which is about twelve foot high is in two sections, one is grey and the other is a yellowish, which is more exposed to the sun.
Can you please advise how after sanding down we can treat with a stain or oil based product , and can you advise about future maintenance. Thank you in anticipation as to products to use.
Alan Ausden
Hello Alan,
Once sanded down and you have clean bare wood, I would recommend a preservative first, Osmo WR Basecoat and then two thin coats of the UV Protection Oil Extra also from Osmo. These two products work very well together.
If you are looking to apply some colour to the wood, however, I would recommend the Natural Oil Woodstain the benefits of using either of these oils is that they are easy to maintain and repair over time. Simply apply a fresh coat of oil when you feel that the wood needs it, this could be annually or bi annually depending on the exposure that the door gets. If you have a look at the products and if you have any further questions I would be happy to help.
Kind Regards Sam.
I’m planning in refurbishing my front door. It’s really knackerd. I would like to show before and after once I’ve found someone who can help.
Hello,
We always like to see customer projects, you can send photos to wood@finishes.direct and if you need any advice or help feel free to get in touch.
Best Wishes Sam.
Hi, these tips sounds very interesting as well as easy to implement. Even my barn doors are in a horrible state. So I thought of replacing them with new ones, but after reading this post, I am planning to try these steps. Lets hope for the best.
That’s great to hear Jeff, feel free to send us some photos if you get a chance. Many Thanks Sam.
Brilliant guide guys- You’ve actually made it sound so easy. My line of work involves door furnishings but I have to say that I absolutely love classic door furnishings- You simply cant beat the antiques, particularly when appropriately restored.